Your first game with Game Maker Studio 2
Case Study: Onna Gokoro (RPG Maker 2000)Game Maker Studio (GMS) is a versatile integrated development environment (IDE) which allows the fast and comfortable creation of cross-plattform and multi-genre video games. Successful game titles like Hotline Miami, Undertale, Downwell, Nuclear Throne und Hyper Light Drifter were developed with GMS. Game Maker Studio 2 (GMS2) is the newest incarnation and can be already purchased as a beta build. GMS2 has an improved room and sprite editor and is a wonderful starting point for game development! This tutorial will help you to build your very first videogame! We want to remake “Onna Gokoro” in GMS2, a fairly popular german RPG Maker-game from Sabaku. You will learn different functions and possibilities of GMS2 during this course. Feel free to ask questions and leave a comment!
Part 1: Setting up a project and first steps to a working title screen!
Today we learn how to:
- create a room with cameras and viewports
- create an object with a draw event
- write your first tiny script
Ok, let’s start!
We create a new project (File -> New Project) and select Game Maker Language (GML) as the project type. This setting allows an optimized workflow when we primarily script our game.

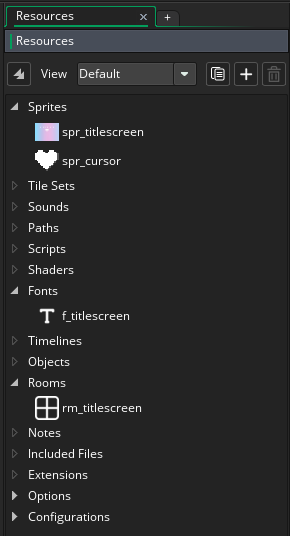
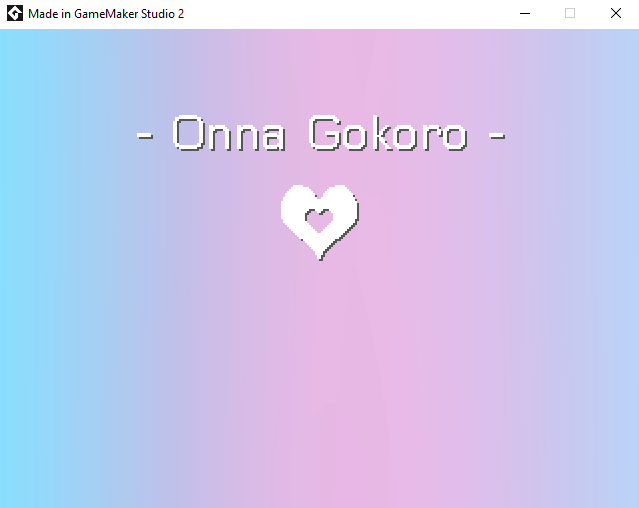
The ressources tree is on the right side. This window contains our created assets, scripts, rooms, objects and so on. You see two sprites in the Sprites subitem (spr_titlescreen and spr_cursor). I drag and drop them easily into the IDE. spr_titlescreen is a 320x240 sized background graphic for our title screen and spr_cursor a 15x13 sized heart icon for our menu navigation. rm_titlescreen is the default room, which I renamed with right-click. f_titlescreen is the font I want to use in the title screen.
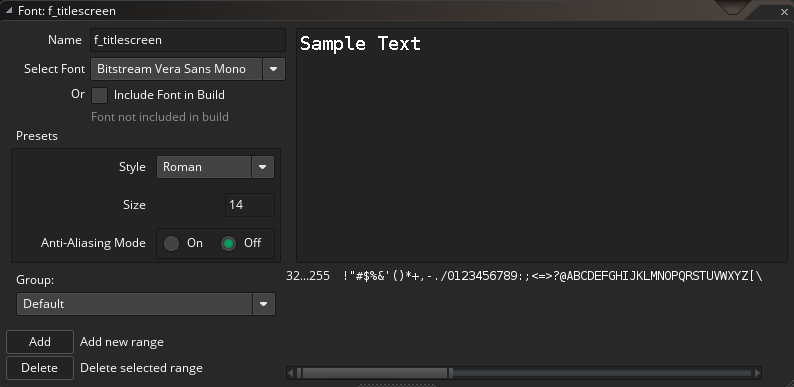
Just a few words about the font: right-click on the font subitem in the resource tree and create a new font. The following window will appear. I use the free font Bitstream Vera Sans Mono, but every font on your computer can be used, unleash your creativity!
So these are all ressources we need in today’s part. Let’s double-click on rm_titlescreen to open the room editor.
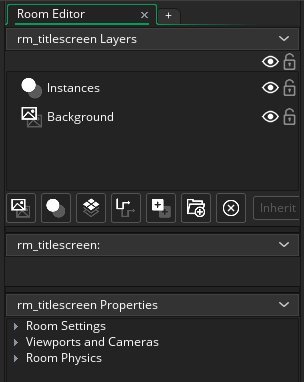
Layers work like in the raster graphics editor of your choice and allow the implementation of backgrounds, objects, tiles and assets at different depths. For example: parallax scrolling can be easily achieved by the usage of two different background layers.
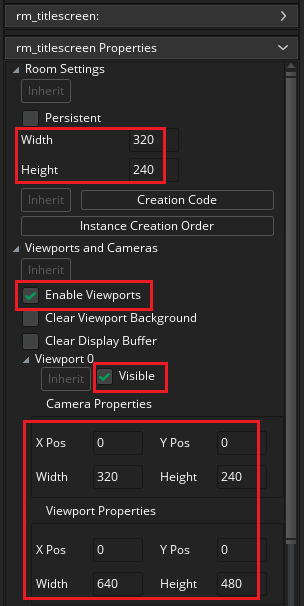
We will focus on the room properties and set them up for our title screen. The room size can be adjusted under Room Settings. We choose 320x240 since this is our target resolution and our background sprite has the same dimensions. We enable the viewport, make it visible and adjust the width and height in the Camera Properties and Viewport Properties. The distinction between room, camera and viewport isn’t so simple for beginners so let’s visualize their relationship:
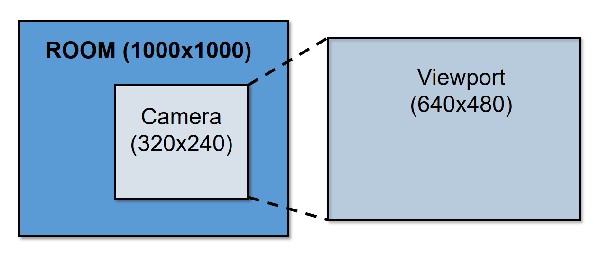
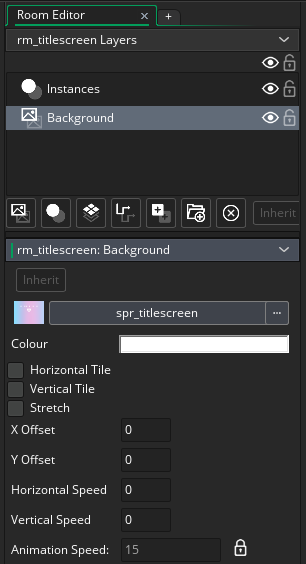
The camera is the canvas, which represents the visible part of our potentially big room. The viewport is the area of the display, on which our view will be drawn. Our initial resolution for Onna Gokoro is 320x240, which will be scaled up to 640x480, so we can maintain our crisp pixel art and have a game window big enough to look at the beautiful art. Let’s go to the next step: we left-click on the background layer and add spr_titlescreen as our background to this layer. Congratulations, you finished the first part of this tutorial!
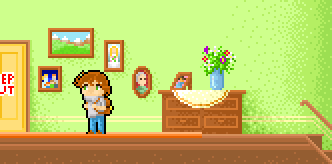
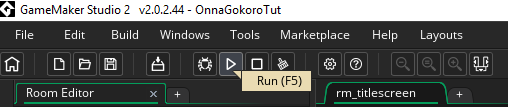
Ok, let’s start our game with the play button or by pressing F5. Sidenote: GMS2 is assuming, that the first room in your resource tree is corresponding to the first room in the game.
The following window should appear on your monitor. If this is not the case, go through the tutorial again and look for a typo or a missing check mark.
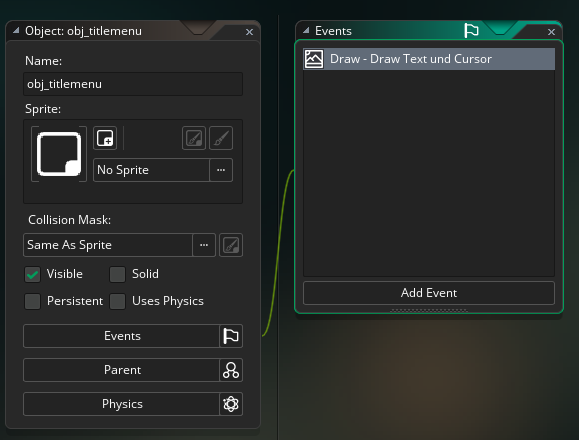
The last part of our tutorial is the implementation of text and our cursor. We need to create an object to deal with the drawing process. Go to the ressources tree and right-click on Objects, than left-click on Create. The object window will pop up. We rename the object to obj_titlemenu and add a draw event by left-clicking on Add Event. The code in the draw event will be executed every frame/step and will draw our sprites and text.
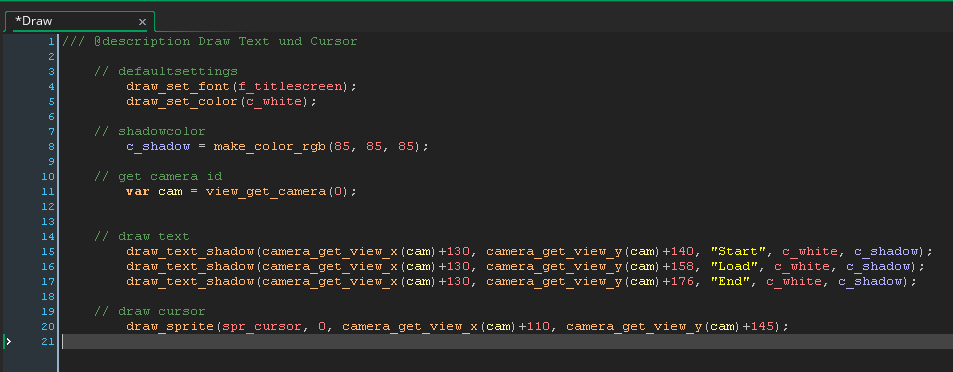
I wrote the following code in the draw event:
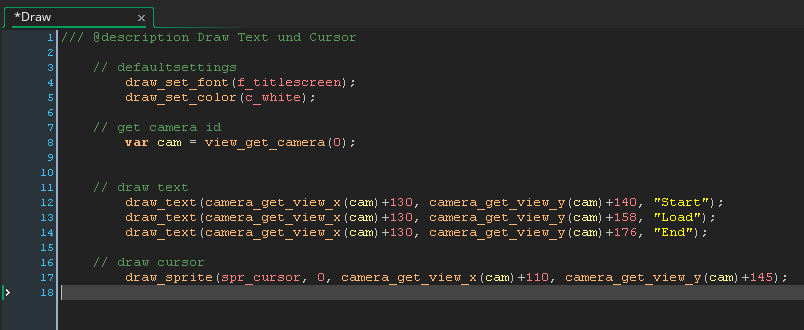
You can assign comments by the addition of double slashes in front of the corresponding text. This is very useful for code maintaining.
// defaultsettings I defined a default font and default font color, which will be used in the rest of the code.
// get camera id I saved the ID of our camera (we set up the camera in the room editor) in the variable cam. This is important because we want to define the text position in relation to the camera coordinates and not in relation to the room coordinates.
// draw text Now we draw our text. The function in GMS2 to draw text is draw_text(x, y, “string”); The (x,y) coordinates in the upper left corner of our camera view is (0,0), the lower right corner has the coordinates (320, 240). Since the (x,y) coordinates of the room in the upper left corner will change than we move through the room, we will take the x- and y-values of the camera. The x-value and the y-value of our camera view at the upper left corner is always (0,0). We grap the x-value of the camera using camera_get_view_x(cam) and add some numbers to shift the text. The same for the y-value.
// draw cursor We can draw sprites in our room by using the function draw_sprite(sprite, subimage, x, y); The subimage is important, if you use animated sprites and wants to grab the right image. In our case, the subimage will stay 0.
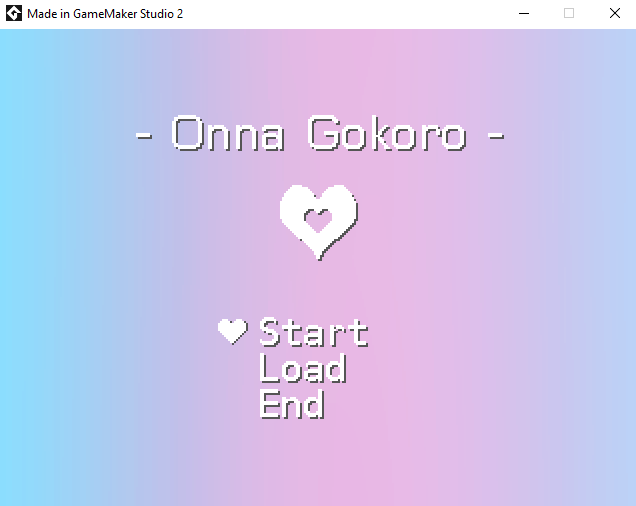
Open the room editor again and drag the object obj_titlescreen from the ressources tree and drop it into the room. An object placed in our room will be executed. Let’s start the game again and look at the result:
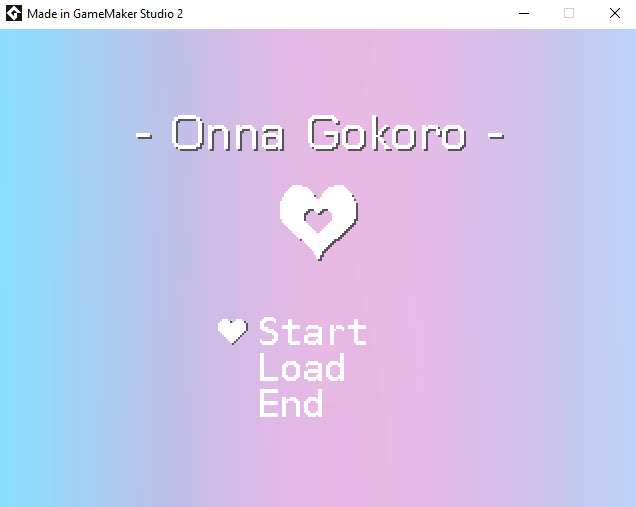
This doesn’t look so bad at all. The font is a little bit boring and doesn’t match well with our title. It’s time to add a shadow! We will create a new script, which will solve our problem. We can write our own functions like draw_text(); with scripts, this will keep our code neatly arranged. Go to the ressources tree, right-click on Scripts and create a new script. Write the following code:

What does this script do? We want to create a new function with the name draw_text_shadow(); You can see the arguments in the bracket, which we want to pass to the script (x, y, string, color, shadow_color). These arguments are the x- and y-position of the text, corresponding to argument0 and argument1. We save these arguments in variables, in this case var xx and var yy. argument2 is the text string, saved in var str. We change the color of the text to the shadow-color (argument4) and draw the desired text with a x- and y-shift of one pixel. This is our shadow. After that, the font color is changed back to the default color (argument3) and the text is drawn at the right x and y position.
Now is the time to update the draw event of obj_titlemenu und define the shadow color using the make_color_rgb(); function. The code should look like this:
Let’s call it a day! First, we check our result and press on the play button. Enjoy the new font shadow! If your result is different, check the tutorial again and leave a comment! We can try to solve the problem!
The next part of this tutorial will deal with keyboard input and cursor movement! Feel free to leave a comment and see you next time!
Tweet